This recipe was one that I wanted to take from one recipe and another and another. I wasn’t sure if it would all come together, but I just knew somehow that this fish needed a little bit of sweet, a little bit of spicy, and a bit of creaminess to bring it all together. This recipe is keto friendly, paleo, gluten free, and grain free too! So it’s a win all the way around! Abbie absolutely devoured it and my husband loved it too. He is very happy with the amount of seafood I have been experimenting with lately, considering I was never a fan!
The sauce on top is a cilantro sriracha aioli. It’s my go-to for a lot of different items, so a staple in our house.
Ingredients
4 Fresh or Flash Frozen (thawed) Mahi Mahi fillets
2 tbsps olive oil
1 tbsp cumin
1/2 tsp onion powder
1 tsp chili powder
1/4 tsp pink himalayan salt (or regular sea salt is fine too)
For the Salsa:
1/2 cup Mango, diced
1/4 cup -1/2 cup red onion, finely chopped
1/4 cup – 1/2 cup cucumber, peeled and diced
1/4 cup Roma Tomato (optional, I am not a fan of tomatoes, I had part with and part without)
2 tbsp cilantro, either dried or fresh but finely chopped
1 tbsp lime juice
Either: 1-1/2 tsp jalapeno, minced or 1/4 cup Poblano Pepper finely diced (this just depends on how hot you want it, I made it both ways, both are great, jalapeno makes the salsa a little less sour)
For the Cilantro Sriracha Aioli:
1 cup avacado mayo
1 tsp sriracha (or more to taste
1/2 tbsp cilantro
1 tsp basil
Directions
Preheat large skillet or grill over medium heat. Set Mahi Mahi on a plate and pat dry with a paper towel (be gentle!). Note: If using a grill, drizzle the Mahi Mahi with the olive oil and rub to coat the fish.
Mix together cumin, chili powder, onion powder, and sea salt. Rub the seasonings over each fillet.
Combine all the ingredients for the salsa in a small bowl. Mix well and refrigerate until ready to serve.
Combine all ingredients for aioli, mix well and put in fridge until ready to serve.
If using stove: heat olive oil in the skillet. Place Mahi Mahi in skillet and cook for 3-4 minutes then gently turn over and cook for an additional 3-4 minutes.
If using grill: place mahi mahi on grill. Cook 3-4 then gently turn over and cook for an additional
So I have seen different recipes for these and most of them call for dill and some kind of corn starch or regular flour. First off I don’t like dill and we don’t eat flour so I knew I had to do this another way. These came out really good and the whole family liked them. And at only 2g of carbs each you just can’t beat it. So on to the recipe……
Nutrition Facts: Makes approx. 12-14 Fritters Serving Size: 1 Each Calories: 391|Fat: 28g| Carbs: 2g| Protein: 34g
INGREDIENTS
1lb Chicken (ground, shredded, whichever you prefer, I used Tyson’s shredded chicken to make the meal faster)
2tbsp butter
1/4 cup of almond flour (very fine, blanched)
1 egg, slightly beaten
1/3 cup olive oil mayonnaise
4oz. mozzarella cheese
salt and pepper to taste
Rotisserie seasoning (Ms. Dash or your favorite brand, just be cautious of the carbs)
2tbsp olive oil or coconut oil
Parsley
Instructions:
(If using Tyson’s Shredded chicken) Melt the butter in a skillet over medium heat; and cook entire bag of chicken until completely thawed and cooked through. Remove from heat.
(If using ground chicken no need to pre-cook)
In a medium bowl, combine chicken, almond flour, egg, mayonnaise, 3oz. of cheese, and seasonings. Mix until well combined.
Heat olive oil in a frying pan over a medium-high heat until it is glistening.
Fry the fritters for 3-4 minutes on each side or until slightly browned. Transfer to a plate.
Sprinkle with the remaining 1oz. of cheese and parsley.
So, I will start of by saying this will be the point of the
blog where I am going to give a warning.
What transpires after this worked for me, worked for Abbie, worked for
my husband and our entire family. It may
not work for you at least not in the same manner. I am not a medical doctor and absolutely do
not claim to know all. We are still
learning everyday as T1D changes almost on a daily basis. With that being said…onward!
As I stated school was already out for the summer and we had
made all of these plans like going to the beach for a week and we had a cruise
planned. I had read horror stories of
families that were afraid to leave their homes with their T1D children for fear
of them going low in the car or away from the house but I refused to be that
Mom or do that to Abbie or Jamee. I am
absolutely not saying that if you were that Mom or Dad, you were doing anything
wrong, that is what worked for you and helped you get over your fear. For us, we needed to continue on with normal
life and see that our daughter was not broken, that she could survive, thrive,
and move on.
So, we went home and re-adjusted Abbie’s diet to what the
doctor had suggested since he had told me I was not feeding her enough
carbs. She started getting around 60+ at
every meal. It was extremely difficult I
will say that. Breakfast and lunch were
easier because it was easier to incorporate bread but dinner was a
disaster. She was so full from the main
course I made, trying to get her to eat approximately 40g of side dishes was a
task.
At this point we were still on the multiple injections which
were totaling about 6-8 a day and she was sticking her finger almost double
that because I was curious how food was interacting with her system. Even
without the modern-day technology of a CGM I noticed after a carb heavy meal
her blood sugar would sky rocket and then about 2 hours later it would
crash. I mean a hard crash, not gradual,
but it would go from 140 to about 320-350 and then by the end of the 2nd
hour she would crash down to 40-50. We
called the CDE, and they adjusted her carb ratio because they said that was
really the only thing to be adjusted since she was still on such a low amount
of long acting insulin and this was only affecting her at meals. All this did was to make that original high
number even higher but she would still crash about 2 hours later. And let me tell you they were scary crashes and
they were fast.
I remember my Mom and I had decided to take the girls to
Nags Head for an extended weekend. I
decided to let Abbie just be a kid and we splurged all weekend. I remember thinking, there was no way she
would have that same crash. But you know
what she did. And the poor kid felt
awful. She wasn’t sleeping well, she had
black circles under her eyes, she was moody all of the time, and just didn’t
want to do anything. I think it was
about the end of July, about 2 weeks after the Nags Head trip that I became fed
up. I went to Abbie and asked her if she
wanted to lower her carbs back down. I
told her we would start experimenting with food and fixing things a little
differently so she didn’t feel left out, but that ultimately this was her
decision. She didn’t even hesitate and
that night for dinner she has maybe 15g and was full. Because it had been so long since she had only
had that much, she required a snack later which we of course gave her, she
chose some Slim Jim’s, cheese, and some strawberries.
We noticed an immediate change in her numbers. She leveled out and no longer had the scary
lows at all. Please don’t get me wrong,
Abbie does not have perfect numbers between 85 and 110 all the time. She definitely has highs where she will go up
to around 300 but usually we can pin point what it is and we try to fix it way
before it gets to that point, but more on that in another post. More importantly, she very rarely has lows
and if she does they are lows that we can surely handle, maybe in the 65-75
range. And trust me when I tell you, at
least when it comes to my daughter, it is MUCH easier to bring Abbie up than it
is to try and get her down!
I think even more important is how Abbie felt. She immediately felt different and she will
tell you. She started sleeping better,
her attitude was much more pleasant (well for an 11-year-old that is hormonal),
she no longer had a brain fog, her skin and eyes looked healthier, and she had
the energy to play and just be a kid. So,
we as her parents knew that we were doing the right thing for her. We kept her meals around 15-25g of carbs, a
generous portion of healthy fats, and lean proteins. Most of her carbs come from fibrous vegetables
and the occasional lower carb wrap, lavish bread flatbread or something
similar. When we went back to the Endo
we of course were scolded, but I didn’t care this time. We take care of our daughter 24 hours a day, 365
days a year and this works for us and her.
She was thriving and developing beautifully! But because this was something foreign to him
it wasn’t appropriate for his patient. I
smiled and nodded and decided at that moment my husband and I were going to be Abbie’s
advocate from now on no matter the cost.
Normal pizza has roughly 35g of carbs per slice, this has approximately 10g for the entire pizza. The only way you could add more would depend on toppings.
I start out with Joseph’s Lavash Bread Flat Bread. These are soft and delicious and only 6g Net Carbs for 1/2 of the flat bread. I cut them in half. Get your favorite no sugar added pizza sauce and your favorite toppings and you are all set. Pictured I used 6 Italian Cheese Blend, Monterey Jack, Pepperoncinis, and Pepperoni. They only bake for about 15 minutes so they make for a kid friendly and super fast week night meal!
2-3 Pepperoncinis (or more depending on your taste)
6-8 Slices of Pepperoni (cut up)
Other toppings to consider that would not change carbs (but would change other Nutrition facts): any meat, other cheeses. Most vegetables would change carb count but would be minimal.
Directions:
Prehead oven to 350 degrees Fahrenheit. Line a pan with aluminum foil and lightly spray with cooking spay.
Place your flat bread on the pan. Take the olive oil and drizzle it on the flat bread. Brush it over the flat bread. Sprinkle oregano and basil over the olive oil.
Spoon the pizza sauce onto the flat bread and spread it out.
Sprinkle 1/2 of the italian cheese on top of the pizza sauce. Spread out your toppings. Top with the remaining cheese.
Place in oven for 12-15 minutes depending on how done you like your pizza (I like mine well done, so I cook mine for 17 minutes).
Abbie has been begging me for weeks to make salmon cakes since she has a love for seafood that I just do not understand or share. That is something her and her Dad have in common and I try very hard to accommodate it at least once every couple of weeks with shrimp scampi or Ahi Tuna. I grew up with fried salmon cakes for dinner but I remember vividly my Mom making them with that red canned salmon and the gross product that came out it (insert gagging sounds here). I remember her picking through the fish to get out the bones and the skin and then forming the patties and by the end, the product was fantastic but also loaded in carbs! Now they make skinless and boneless salmon, so there is no picking through that stuff, but in my house, we have the issue that Andy loves all seafood except… yep you guessed it… salmon cakes.
So, I went searching for a crab cake recipe since Abbie has had them before at restaurants while on vacation and loved them and her Dad loves them. The problem is that normal crab cakes have upwards of 15-20g of carbs for 2 cakes. I know that doesn’t sound like a lot but when you add in a side dish or two that will make a meal around 50 to 60 grams of carbs and we have already been through that conversation right?
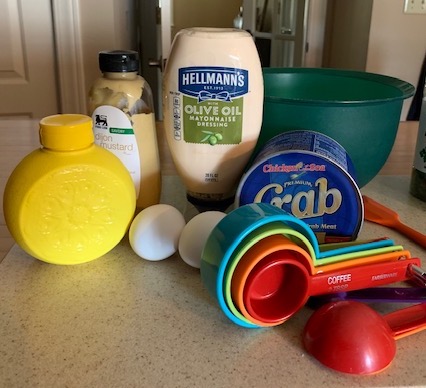
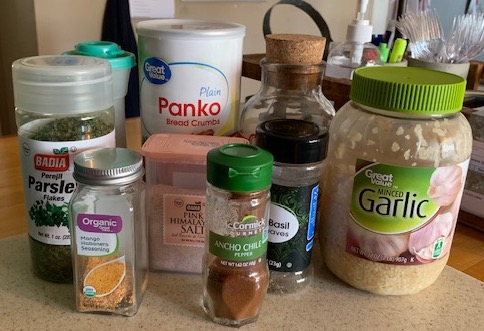
So, I went searching and still couldn’t find exactly what I was looking for. Either they were deep fried or fried in oil or still contained a lot of bread crumbs or no seasoning. So, I decided to put some things together and come up with my own. It started with basics that I knew: premium lump crab meat, eggs, olive oil or avocado mayo, Dijon mustard, and lemon juice. Now to make sure it stuck together. I didn’t want to use bread crumbs but it had to hold together. So, I decided to use panko bread crumbs instead and at some point, I may try an alternative and see if I can bring the carb count down even lower but these are pretty darn low as it is. Next, I moved on to seasoning. I of course knew I wanted them to contain minced garlic, salt and pepper. Then I added some mango habanero seasoning, ancho Chile powder, basil, and oregano. I know lots of spices but I like a lot of taste! Once everything is mixed I made the patties and laid them out on a sheet pan, placed them in the refrigerator for an hour so they could set.
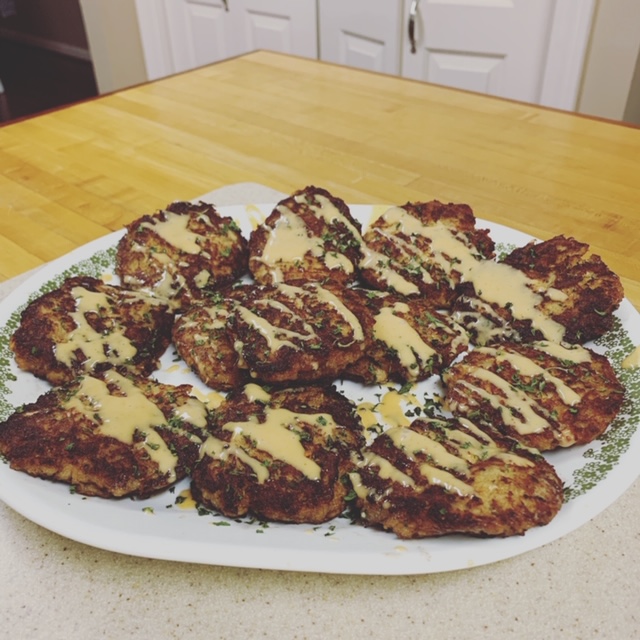
I let them set in the fridge while I picked the girls up from school. Today was a very busy after school day because it was a Dexcom sensor change day, I had to get dinner finished, and I had to be at work by 6pm. So as soon as the girls got Abbie’s old sensor lathered up with Uni-solve so it would come easy and then went to work finishing these up on the stove. On days that I work I don’t usually sit down with my family to eat and today wasn’t any different. So, I finished the crab cakes, placed them on platter with a bit of Yum Yum sauce on top. I spiralized a couple of zucchinis, put them in the oven with olive oil, salt pepper, parmesan cheese and garlic at 375 for about 15 minutes for a side dish and their dinner was complete. I wasn’t really sure how the crab cakes or the zucchini noodles were going to go over with Andy and Abbie but I was sure that a meal that would normally be around 60g of carbs and I had been able to get it down to 18g of carbs for 2 crab cakes and a heaping portion of the noodles was a win-win even if I needed to tweak the recipe at some point.
I was about half way to work when my Carplay in my Jeep interrupted my Juicebox Podcast and told me I had a new text message from Andy. The text message read, “these crab cakes will forever be named, Oh my god crab cakes!” An immediate second message came through that read, “with the zucchini noodles this meal was better than a restaurant.” So, I responded back, “I guess it’s blog worthy then, huh?”. And here we are. I hope you enjoy the recipe.
Whisk together mayonnaise, mustard, sea salt, pepper, lemon juice and eggs. Gently stir in crab meat, panko, garlic and the rest of the seasonings.
Shape mixture into 12 patties pressing them gently to flatten. Place patties on a baking sheet. (I line mine with aluminum foil to lessen clean-up). Cover with plastic wrap or aluminum foil.
Refrigerate for 1 hour or you can place in freezer for 30-40 minutes if short on time.
After 1 hour, melt 1-1/2 tbsp of butter in a large skillet over medium-high heat. Make sure the pan it preheated and butter is melted completely.
Added 4-6 patties to the skillet; cook 2-1/2 minutes on each side or until a golden-brown color. Remove from pan.
EXTRA STEP! This is optional: before placing next patties in the pan, I rinse the old butter out and wipe with paper towel. This keeps them from blackening.
Melt additional 1-1/2tbsp of butter in skillet and repeat step 5.
Garnish with parsley.
Top with Yum-Yum sauce. I pour Yum Yum sauce into a table spoon and drizzle over the patties.
I grew up in a family where we sat around a table every night and ate dinner together. We would talk about our day, what our plans were for the next day or just about life in general. My Mom was a fantastic cook and one of my fondest memories was the lasagna she used to make. I LOVE LASAGNA! Actually, I love any Italian cuisine. As I got older this hasn’t changed and my love for watching my mother cook turned into a love for cooking myself. Now let me insert that I had always been a very picky eater, in fact, I don’t think I ate my first vegetable until I was almost 25 years old! So most items I cooked were down-home southern morsels with heavy side dishes and lots of spices.
Right before Abbie’s diagnosis, my husband, Andy, and I had noticed we had packed on a few pounds (and that’s being generous), so we decided to try out a Low Carb High Fat diet. I started trying new things and expanded my palette and now is someone who is now willing to try anything but that is a subject for another day.
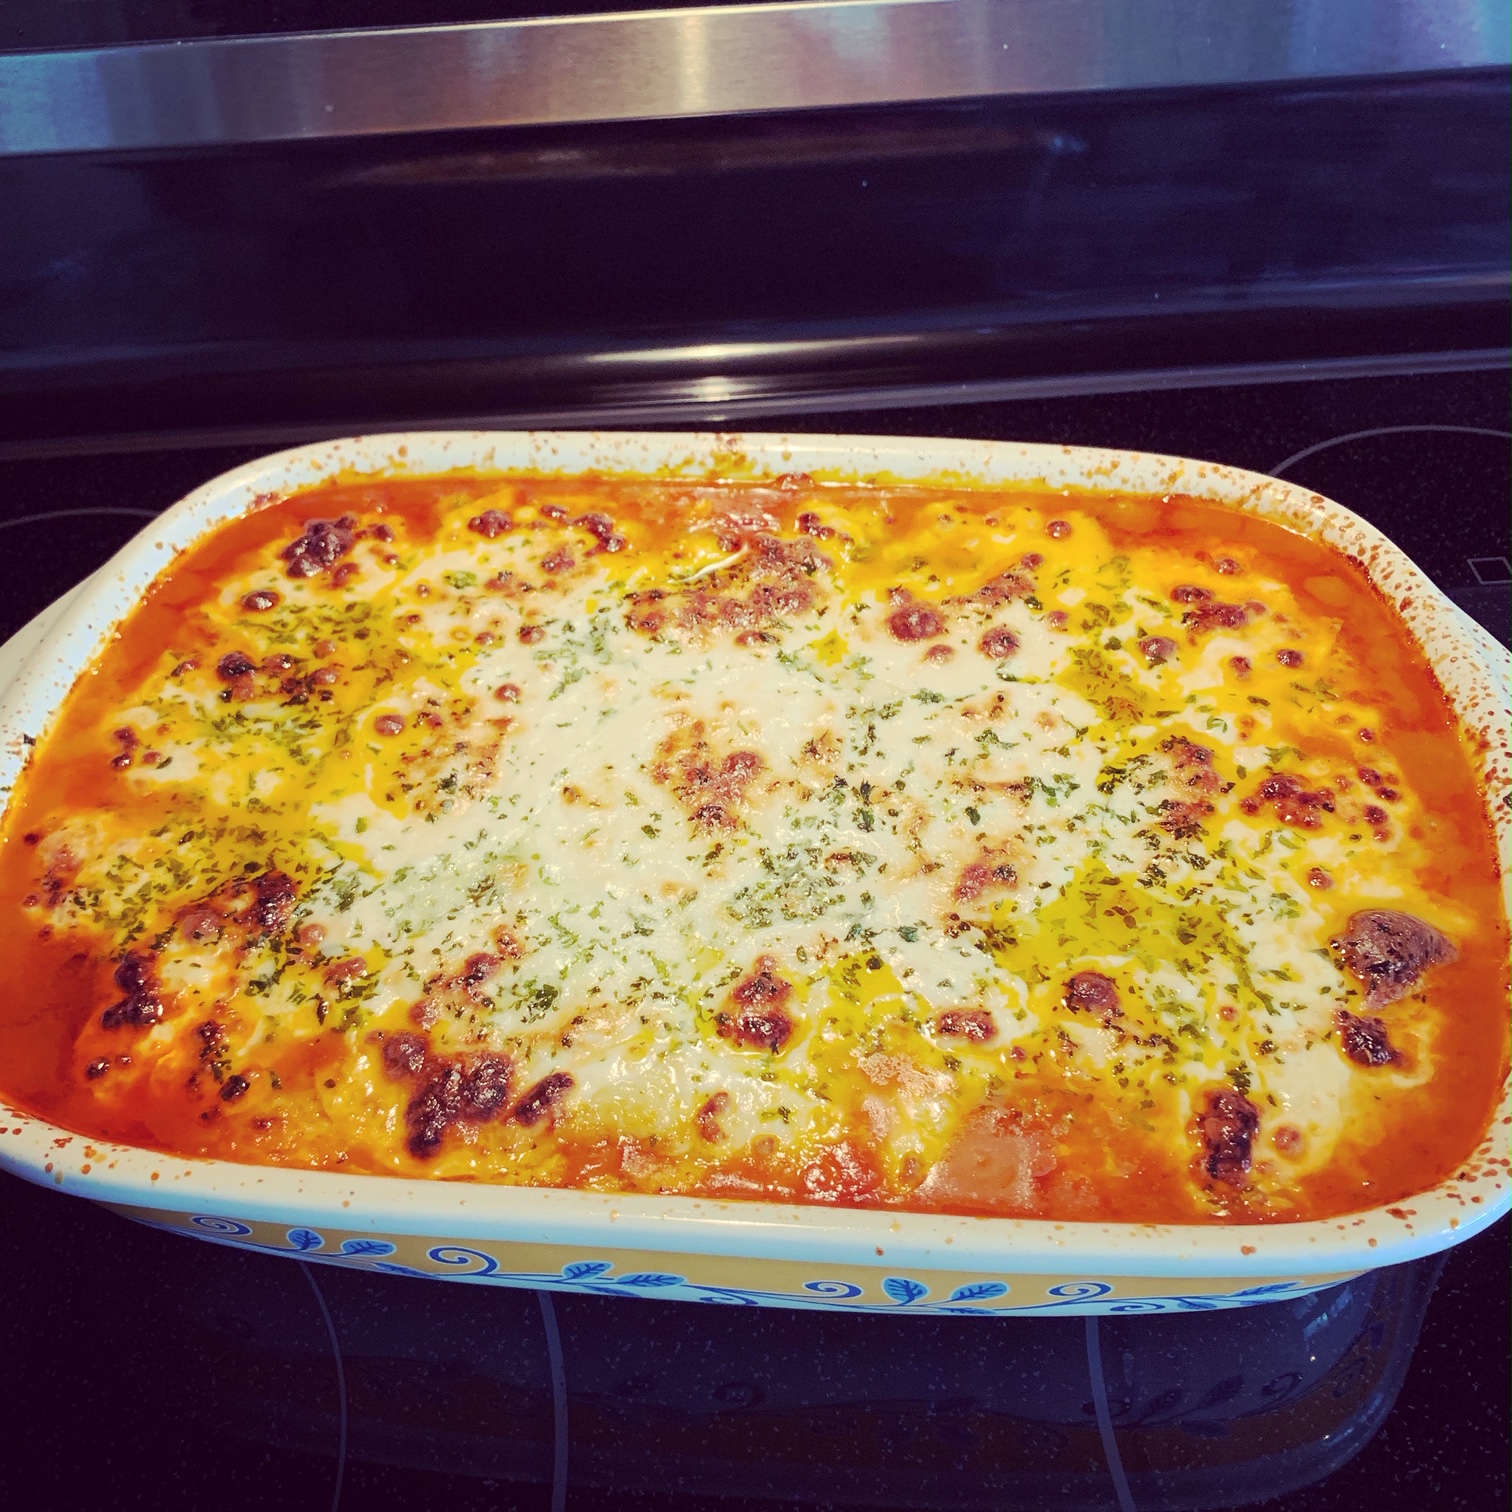
So when Abbie was diagnosed we heard the story of kids need carbs to grow and develop so make sure she is getting between 50-60 grams carbs per meal. My average intake of carbs at this point was approximately 30 grams per day, so that amount for her was astonishing. However, I was not a doctor so we did what we were told. Abbie enjoyed my meals, which were extremely low carb and high fat so they were very filling. So imagine, a normal lasagna has 40-50g of carbs per slice on average right? The lasagna you are seeing here only has 8g per slice and the flavor is out of this world! So how do you stack on an additional 30g to 40g of carbs to fulfill the doctor’s request because you are worried about your kid’s growth and development? So we would add a salad with lettuce, cucumbers, carrots, red onion, a small amount of croutons, and Olive Garden Italian Dressing which only added an additional 10g; so now we still have 20g to 30g to go! Easiest way… we added bread!
You know what happens to Abbie’s blood sugar when you give her a lot of carbs like bread, cereal, pasta, and candy? She has extreme yo-yo numbers. I mean she skyrockets, upwards of 300 and then about an hour later she crashes to around 40-50, which is extremely scary. We continued this trend for about a month after she was put on her pump and CGM before I had enough. She liked my food why was I forcing all of this other stuff on her? It was time to figure out a different way to fix food and I did. We will go into more detail about food in another post but for now… on to the lasagna!
It has to be the simplest lasagna recipe I have ever done.. you know why? There are no noodles to boil, no burning your fingers, no real layers, and no after carb coma! It’s full of hearty flavors such as mild or spicy Italian sausage (whichever you prefer), grass-fed organic beef (you can use regular beef, we use grass-fed because there is no chance of hidden carbs, no sugar added spaghetti sauce, fresh minced garlic, basil, oregano, thyme, red pepper flakes, and of course a lot of cheese including fresh mozzarella slices. My husband was so skeptical about this recipe the first time, as was I, but let me tell you, it makes twelve good size pieces and my family of four destroyed it! We had no leftovers!! It was so good in fact that Abbie asked for it to be served for her birthday dinner with all of her friends! Feel free to share and leave me a comment!
2tbsp Olive Oil (optional depending on pan)
1lb. Grassfed Organic Ground Beef
1lb. Mild or Spicy Italian Sausage
1- 24oz Jar of Ragu Traditional No Sugar Added Spaghetti Sauce (you can absolutely make your own, but I have not gotten around to making a recipe for it yet)
1 sweet onion – diced
2tbsp of minced garlic
1tsp dried basil
1tsp dried oregano
1tsp dried thyme
1/2tsp black pepper
1/2tsp salt
pinch of Red Pepper Flakes to Taste
1-15oz container of Full Fat Ricotta Cheese
1 large egg
12oz. shredded Italian cheese blend
1/2 cup grated Parmesan cheese
16oz sliced fresh mozzarella
Directions:
Preheat oven to 350 degrees F. Heat olive oil in a large skillet (I use a copper skillet and therefore I do not need to use any olive oil, you can omit this step) over medium-high heat. Add the onion, and cook until slightly tender and transparent.
Add the ground beef and Italian sausage; when almost cooked through add the minced garlic and finish cooking until browned. Drain off the excess fat in a colander and return to skillet.
Add tomato sauce, basil, oregano, thyme, black pepper, salt and red pepper flakes. Simmer for 2 more minutes on medium low heat, stirring constantly. Remove from heat.
In a separate bowl, mix the ricotta cheese, large egg, 4oz. of the shredded cheese, and 1/4 of Parmesan cheese together.
Spray a 9×13 baking dish with cooking spray. Fill the bottom with the meat filling. Top with the cheese mixture, spreading it as evenly as possible.
Cover the top with the remaining 8oz. of shredded cheese and the remaining 1/4 cup of Parmesan cheese. Place the sliced mozzarella in a single layer on the top.
Bake for 45-50 minutes, until the top starts to become slightly brown and bubbly.
Let it cool for approximately 10-20 minutes. The longer you let it cool, the better it will hold together.